You’ve probably gone most of your life thinking you need a pedal wrench to get your bike pedals off. While this is definitely a good way of doing so, if you don’t have a pedal wrench, you’re still more than capable of taking off your bike pedals with ease.
Below, we’ve provided you step-by-step instructions on how to take off your bike pedals with tools other than a pedal wrench. With this, making repairs becomes a total breeze.
Reasons for Replacing Your Pedals
Broken Bike Pedals
Before we teach you just how to take off your bike pedals without a pedal wrench, we figured it would be important to discuss why you might be replacing your pedals in the first place.
While it totally depends on the rider, there are various reasons your bike could be in the market for some new pedals. Primarily, we see this once your original bike pedals have broken.
Often, standard bike pedals are made out of cheap plastic materials that are just begging to be upgraded. When they’re not, over time, they’ll become much more susceptible to damage and wear and tear than a sturdier metal option. This can not only hinder your riding experience, but it creates quite an eyesore, too.
In the event that your current bike pedals are damaged, broken, or just not looking the way you want them to, it’s probably time to make a replacement, and get rid of the old bike pedals. This can change both the appearance and performance of your bike.
Upgrades
Maybe you’ve simply outgrown your old, plastic pedals. If this is the case, you don’t have to settle for keeping the pedals that are subpar.
Instead, you can find and purchase a better, higher-quality set of bike pedals that give you just what you need. Clipless, flat, or bear claw, there isn’t just one type of pedal for you to settle with.
Take the time to find which type of bike pedal feels best on your foot, as well as look best on your bike. From there, you can make the necessary upgrades to your bike in other ways, too.
Change in Style
There’s a chance you’ve already upgraded your bike, but now you’re simply looking for a change in style. Replacing your bike pedals is a great way of switching up the style on your bike and giving it a whole new look. While subtle, the changes they make can make a world of difference for the bicycle you’re riding, and can greatly impress other riders out there.
Whether you’re wanting a splash of color, a different material, or a completely different style on your bike pedals, there are options that are perfect for you. No matter how you’d like to change or upgrade your street bike, road bike, or mountain bike, a brand-new set of bike pedals can do all that and more.

Step-By-Step Instructions
Step 1. Determine Your Pedal’s Size
First, you need to determine what size your pedal is to find the best size wrench. Since you don’t have a pedal wrench, typically, your standard 15 mm open-end wrench will do the trick just as easily.
From there, take a look at the pedal and ensure that it has a wrench flat on the spindle for your wrench to attach to.
If the pedal doesn’t have this, this method, unfortunately, will not work. Older mountain bikes or even some road bikes have pedals that simply do not have wrench flats that are compatible with your standard 15 mm, and need an 8 mm Allen bit instead.
Once you’ve located the flat wrench spindle next to the bike pedal, it’s time to get to work.
Step 2. Apply Wrench to Spindle
Now that you have your standard wrench–not pedal wrench–and have located the spindle, put the wrench directly onto the pedal spindle itself. It should hang on to the spindle on its own.
After it has been tightly attached to the spindle, you’ll want to move the pedal backward, making the wrench handle as parallel to the ground as possible. Make sure your bike is in a steady position, kickstand down.
Step 3. Get on the Bike
From here, it’s best to actually get on the bike to have as much leverage as possible. Put one foot onto the pedal, while the other is on the ground as if you were about to start riding like usual.
From here, the ball of your foot should be on the bike pedal while your heel is resting on the rest of the wrench. Then, step down on your foot, putting pressure directly onto the wrench itself.
Apply as much body weight as you need to the wrench. Eventually, it will start moving underneath your foot, effectively loosening the pedal.
Try to continue applying equal weight to both the bike pedal and wrench to ensure you don’t break the wrench loose.
Your weight should push the wrench downwards, diagonal to the ground. Once it is in this position, you’re ready to remove the pedals.
Step 4. Remove the Pedals!
This one movement should be enough to loosen your bike pedals, but you may need to take your wrench and do one more quick loosen just with your hand. Then, you twist your bike pedal counter-clockwise until it screws right off.
Repeat these exact same steps for the other side and voila ! You’ve successfully taken off your bike pedals without any need for a pedal wrench.
Step 5. If the Pedals Don’t Come Off!
If you’ve done all of this and pedals still are as tight as can be, this may mean that your pedal has been reversely threaded.
If this is the case, then instead of your standard righty-tighty, lefty-loosey, you must instead adhere to righty-loosey, lefty-tighty when unscrewing the spindle from the pedal.
Often, you’ll find that your right pedal has been threaded normally, while your left pedal may have the reverse threading you’re not used to.
Pay attention to the direction the bands are turning to determine which ways they have been threaded, and then start twisting from there.
Is a Pedal Wrench Worth it?
Now that you’ve seen that you can easily remove your bike pedals without an expensive pedal wrench, it begs the question: should you even have one?
While this does all come down to personal preference, having a pedal wrench is still the most trustworthy, reliable tool out there to get rid of your bike pedals.
As we’ve demonstrated, it is more than possible to do it without, but you’re always running the risk of doing something improperly and accidentally damaging the bike.
Or, your bike spindle may not be suitable for the regular wrenches that you have. For all of these reasons, it still might be worth it to have a pedal wrench on hand. In a pinch, however, they aren’t necessary for changing your bike pedals if need be.
Some of the best, most affordable pedal wrenches can be found here, giving you a perfect option for a high-quality pedal wrench that won’t hurt your bank account.
Other Products to Try
If a pedal wrench isn’t for you, or if you’re just in the market for some brand-new bike tools that’ll make your rides easier, we have just what you need.
Bike Multi-Tools
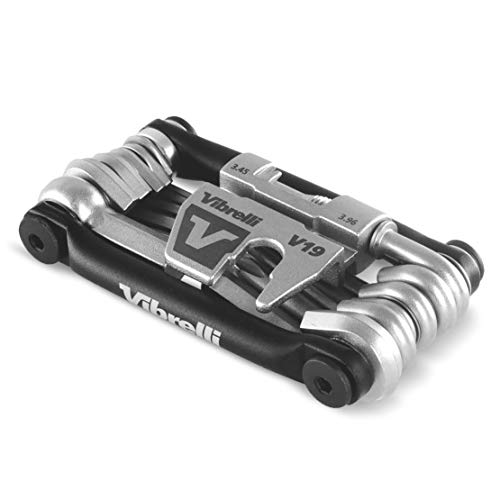
The Vibrelli Bike Multitool makes for a great all-in-one tool for every repair you could make. This one comes with spoke wrenches, open wrenches, and screwdrivers of various sizes to help fit most bicycles.
It’s also quite slim and more lightweight than you’d think, making it easy to take practically anywhere. A multitool such as this one makes it so you’ll never have to rely on a pedal wrench again.
The WOTOW 16-in-1 Bicycle Tool Kit is the only bike tool you’ll ever need. Packed with an 8/9/10 mm. socket hex wrench, slotted screwdriver, Phillips screwdriver, socket extension, 2/2.5/3/4/5/6 mm. hex key wrench, and even more, you have an entire repair kit in the palm of your hand.
Plus, this set comes with an extra 3 tire pry bars, making for an even more comprehensive kit. With this multitool, fixing or upgrading your bicycle or removing bike pedals is a breeze.
Bicycle Tool Kits
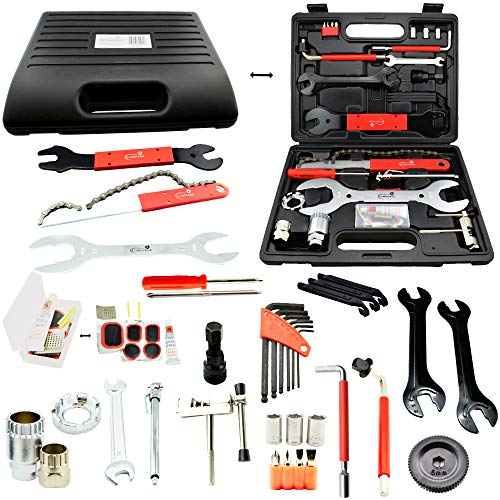
From pedal wrenches to tire patch kits to screwdrivers, the Lumintrail 42-piece Bicycle Maintenance Tool Set truly is a bicyclist’s dream. This all-encompassing repair kit contains tools of all types, far more advanced than a small multitool could handle.
With this, problems both small and large can be easily remedied, with every component having its own place. Every tool comes properly organized and ready for use, made of only the highest-quality materials for reliable performance.
Bicycle Repair Stands
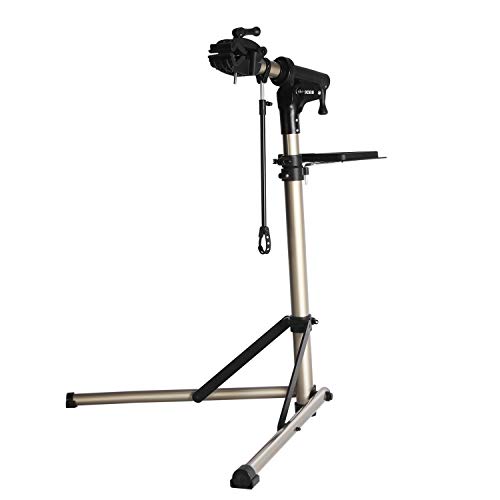
In the event that you have a major repair, or you’re hoping to put on a set of brand-new tires, nothing makes the process easier than a bike repair stand. Repair stands like CXWXC’s offer an easy, convenient way of fixing your bike right in the comfort of your home or garage.
This useful tool helps to hold your bike off the ground, without any shaking or swaying, so the pressure is totally off of you. Plus, the rubber feet will keep your bike steady without scratching your floors.
For easy storage and quick maintenance, Clothink’s Bike Repair Stand is the way to go. This bike stand attaches to your wall, acting as a clamp to suspend your bicycle for effortless repairs and cleaning. Whenever it’s not being used, this bike stand folds up and stays out of the way, not taking up any space in your garage or workroom. Great for more than just making repairs, this high-quality bicycle stand gives you a place to display, clean, or store your bike with ease.
Making the Repair
Now, you have all the tools you need (metaphorically and physically) to help you make all the repairs you need on your precious bike.
While replacing the pedals without a pedal wrench may have seemed like a Herculean task at first glance, as you can see, the whole process can be a lot easier than you realize. As long as you have the right tools, anybody can take off their own bike pedals.
Whether you’re hoping to make an entire upgrade to your bike or are just doing some minor repairs, Cycle Baron is here to make the process a walk in the park.


